How to permanently or temporarily Delete a Facebook account?
Guidelines for permanently or temporarily Delete a Facebook account.
Step 01
Log in to your
Facebook account with your browser. You can download a Web browser if you do
not have any,
Windows PC
- Firefox, Edge, Chrome or Mac PC -
Firefox, Edge, Chrome
Step 02
After you log in to
your account, “Click” on your
profile picture in the top right corner of the Facebook page.
Step 03
When you click your
profile picture in the top right corner of the Facebook page, on the menu,
select “Settings & Privacy.”
Step 04
Then select "Settings," then click Settings.
Step 05
After you click
"Settings," the account
center window will open.
If "Accounts Center" appears in the
upper left of your Settings menu, you may remove your account there. You may
remove your account using “Facebook
Settings” if the Accounts Center is at the bottom left of your Settings
menu. (Most of the accounts now will be deleted from the account center after
the meta update.)
Account Center
Step 06
Click on “Accounts Center,” and the account center window will open.
Step 07
On the account
center window, find “Personal Details”
under "Account Settings” and
click it.
Step 08
Once you click “Personal Details," you can see
your personal details on the right side of the window. Click “Account ownership and control.”
Step 09
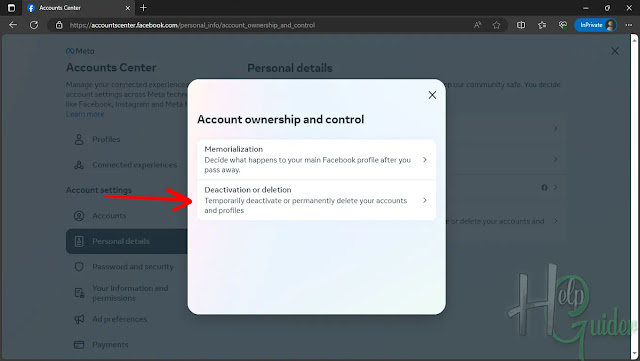
Once you click “Account ownership and control,"
Pop up a small window, Under the Account ownership and control setting, click “Deactivation or deletion.”
Step 10
To begin, you have
to choose the account that you want to temporarily disable or permanently
erase.
Step 11
If you wish not to use
Facebook for a while, you can delete this account temporarily. For that, just
check the “Deactivate Account,"
and the account will be Deactivating your account is temporary, but you can use
Messenger while your account is temporarily deactivated.
If you wish not to
use Facebook forever, you can permanently delete your account by just checking
the “Delete account” option. If you
delete your Facebook account, your profile picture will disappear, your account
will not show when searched, your content will vanish, and you can't log in to
the accounts where you are on other websites. Your Facebook account to access
Meta Quest products or your Meta Quest information will also be deleted. This
includes your app purchases and your achievements. You will no longer be able
to return any apps and will lose any existing store credits.
Step 12
Deactivate account
If you want to Deactivating
your account is temporary, check the “Deactivating
your account is temporary” option and click “Continue.”
Step 13
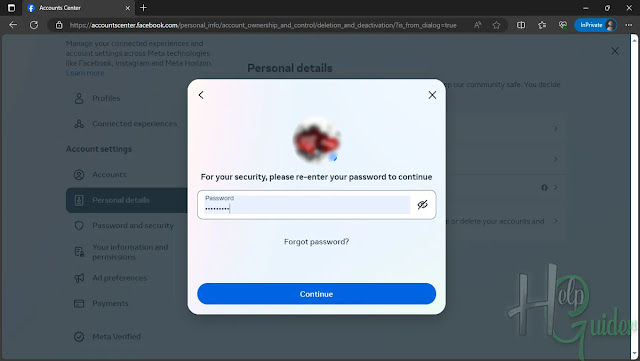
Here, you have to
enter the login password for your security. Enter the password, then click
"Continue.”
Step 14
You have to select
one of the answers, Why are you “Deactivating
your Facebook account?" Select one of them, then click "Continue.”
Deactivating your
account will remove your name and photo from most things you've shared on
Facebook. Some information may still be visible to others, such as your name in
their friend list and messages you sent.
Step 15
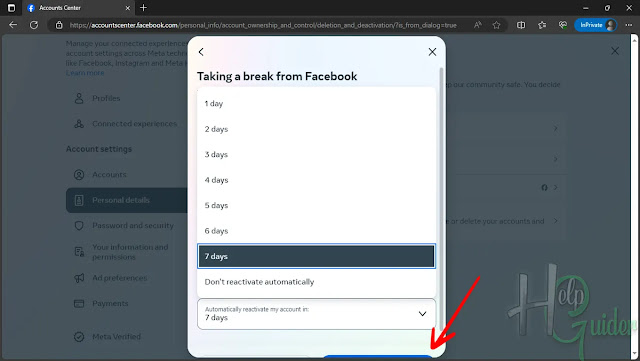
You can
automatically reactivate your account by “Selecting”
the number of days, and then Facebook will automatically reactivate your
account for you after that day counts, or you can select “Don’t reactive automatically.” If you select Don’t Reactive
automatically, the account will be in Deactive mode until you are reactive by
using yourself, or you can be reactive by just logging in to the account.
Select what you prefer, then click “Continue.”
Step 16
In the Confirm
temporary account deactivation window, “Groups
you admin” section, you can see the groups you have created and also you as
an admin of the groups. If you are the only admin of the group, you must add an
additional admin to keep the group active and accessible. (If you are the only
admin and deactivate the account, you will lose the adminship in these groups
after 20 days from the deactivated date.)
To add an additional
admin, click “Edit Admins.”
Step 17
After you click “Edit Admins," Facebook will take
you to the Group Admins settings page. On the left side panel, click “Admin Tools.”
Step 18
Under the “Admin tools” panel, find and (1) click
“Community Roles." You can see
the settings for Community Roles on the right side. (2) Under “Standard Roles," click "Admin.”
Step 19
Add admins window, (1)
search admin who you want as an admin of your group, then (2) click “invite”
Step 20
Confirm the
temporary account deactivation window. “Messenger”
Section: (1)check “Continue using
Messenger” if you want to continue using your main profile's Messenger.
Using Messenger will not reactivate your deactivated Facebook account.
(2)After that, click
“Deactivate my account.”
As soon as you click
“Deactivate my account," your
account will automatically log out.
The Facebook account
will automatically reactivate after that day counts, or you can reactivate the
Facebook account by just logging in to the account.
Step 21
Delete account
If you want to
delete your account permanently, (1)check the “Delete account” option and (2)click "Continue.”
Step 22
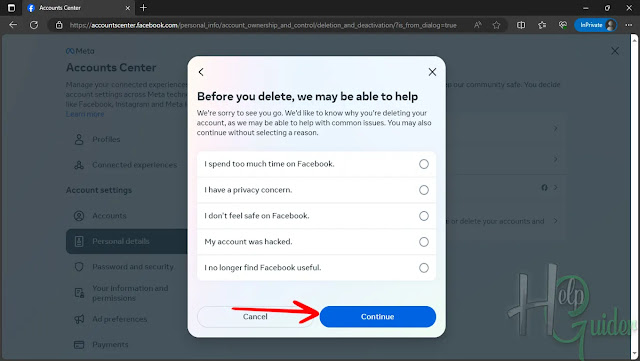
Select: Why do you
want to delete your account? Check any of them, or you can just click “Continue” to go to the next step.
Step 23
Here in the “Permanently delete account” window, you
can see a few things you can do before you delete.
To keep Messenger, deactivate instead
You can deactivate
your account instead of deleting it. By clicking “Deactivate Account," it will take you to the deactivation
process.
Step 23 - 2
Save posts in your archive
If you choose to
keep your account but remove some posts and photographs from your profile, you
may move them to your archive. Just click “Go
to activity log.” From here, you can manage your posts, comments, and much
more.
Step 23 - 3
Download your Facebook information
If you want to save
this information before your account and content are permanently deleted, you
can download a copy of your information. Click “Download Info” to get the file with your information.
Step 23 – 3 - 1
You have to request
a copy of your information. When your file is ready, you'll have 4 days to
download it. It's also a password-protected process that only you have access
to. Click “Request a download.”
Step 23 – 3 – 1 - 1
You can request a “Complete Copy” or “Select The Types Of Information” to include in your file. If you
want a complete copy, just click “Complete
Copy.”
Step 23 – 3 – 1 – 1 – 1
Select file options.
You can modify only a few options here; modify them as you need. Then click “Submit request.” You will get a
notification when the file is ready, and you'll only have 4 days to download
your file.
Step 23 – 3 – 1 – 2
If you want to
download only a few pieces of information, click “Select types of information” to go to the next step.
Step 23 – 3 – 1 – 2 – 1
You can choose the
types of information you want to download for each profile. After you have
selected what you want to download, click "Next.”
Step 23 – 3 – 1 – 2 – 2
Here, you can modify
only a few options. Modify them as you need. Then click “Submit request.” You will get a notification when the file is
ready, and you'll only have 4 days to download your file.
Step 23 – 4
Transfer a copy of your information
You can transfer a
copy of your posts, photos, and video information to another service.
Information you can transfer includes posts, photos, videos, and more. If you
want to transfer click “Transfer Info”
to transfer a copy of your information.
Step 23 – 4 – 1
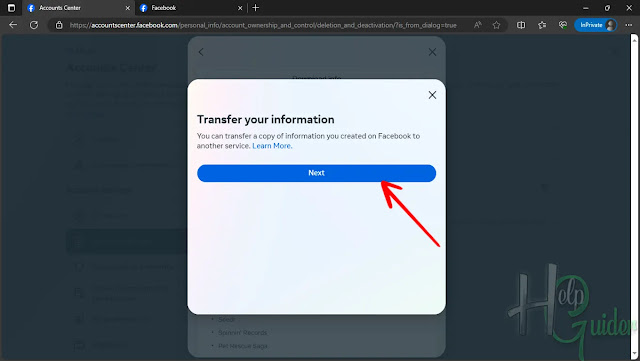
You can transfer a
copy of your posts, photos, and video information to another service. Click “Next” to go to the next step, or just
close the window if you do not need it.
Step 23 – 4 – 1 – 1
You can transfer a
copy of all your posts, photos, and video information to another service. You
can transfer all your information by clicking “Your photos and videos,” or if you want a few of them, you can do
it by clicking “Create custom transfer.”
If you want to
transfer all Photos and videos, (1)check “Your
photos and videos," then (2)click "Next.” Go to the next step.
Step 23 – 4 – 1 – 2
Choose where you
want to transfer your photos and videos. Then click on the service where you
want to transfer.
Step 23 – 4 – 1 – 3
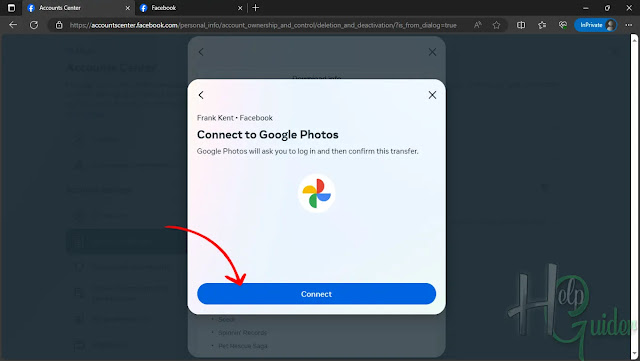
Now, click “Connect” to connect the account and
start the transfer.
Step 23 – 4 – 1 – 2
You can transfer a
copy of a few of your posts, photos, and video information to another service. if
you want a few Photos and videos (1)Check “Create custom transfer," then (2)click "Next.” Go to the next step.
Step 23 – 4 – 1 – 2 – 1
Choose where you
want to transfer your photos and videos. Then click on the service where you
want to transfer.
Step 23 – 4 – 1 – 2 – 2
Now, Choose to transfer
a copy of your photos or videos to the selected service. Only certain types of
information can be transferred. After you select what you want, Click “Next.”
Step 23 – 4 – 1 – 2 – 3
Now, click “Connect” to connect the account and
start the transfer.
Step 23 – 5
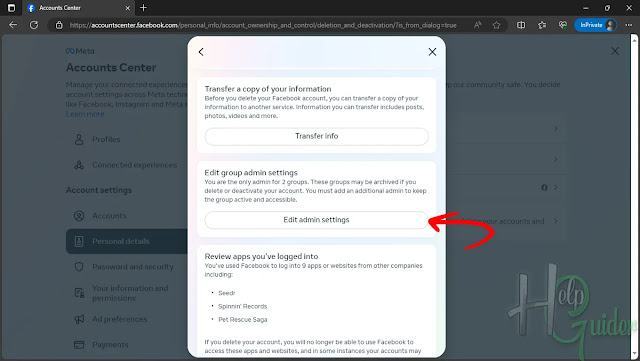
Edit group admin settings
You have to add
admins to your groups. So, by clicking “Edit
admin settings,” it will take you to the “Groups” dashboard. Go to each group and add an additional admin to
keep the group active and accessible.
Step 23 – 6
Review apps you've logged into
Here you can see and
manage the website that you have used Facebook to log in. Clicking “View linked apps” will take you to the
“Apps and Websites” page.
Step 23 – 6 – 1
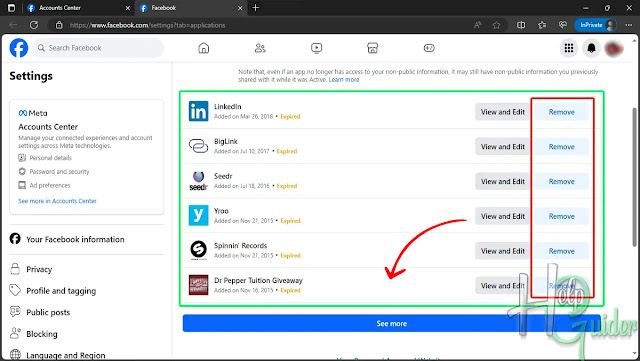
Under “Apps and Websites," you can see
the list of websites and applications that you have used Facebook to log in.
Click “Remove” to unlink everything.
Then Close the “Browser Tab.”
Step 24
Now, click “Continue” to go to the next step.
Step 25
Here, for your security,
enter your logging password to continue. Enter the password and click "Continue.”
Step 26
Here we are. This is
the final stage. Read the message, and after reading it, click “Delete account.”
Message
“You're about to schedule your account for
permanent deletion. Once you schedule your account for deletion, you have 30
days to reactivate your account and cancel the deletion. After 30 days, the
deletion process will begin, and you won't be able to retrieve any of the
content or information you have added.
You can cancel the permanent deletion process at any
time before the process starts through the Accounts Center or by logging into
your Facebook account with your email, phone, and password.”


